When I first started learning machine learning, I was fascinated by how algorithms could predict outcomes from data. But like many beginners, I relied heavily on high-level libraries like scikit-learn, treating models as black boxes that magically produced results. I wanted to change that, to truly understand what was happening under the hood.
So, I decided to build a linear regression model from scratch, using only NumPy, to predict house prices in Seattle. No shortcuts, no model.fit(), just raw math, code, and a lot of learning along the way.
Here’s the story of how I did it, the challenges I faced, and the insights I gained.
Why Build from Scratch?
Before diving into the code, I asked myself: Why go through the trouble of implementing an algorithm manually when libraries like scikit-learn already do it efficiently?
The answer? Understanding.
Anyone can call .fit() and .predict(), but if you can’t explain how gradient descent updates weights or why feature scaling matters, you’re missing the foundation of machine learning. By building from scratch, I forced myself to:
- Truly grasp the math behind linear regression.
- Debug issues when the model didn’t converge.
- Appreciate the importance of preprocessing.
Plus, recruiters love seeing this kind of depth, it shows you’re not just a library user, but someone who understands the mechanics.
Step 1: Import Libraries
The very first thing we always do in any machine learning project is import the libraries we need.
Since the goal of this project is to truly understand linear regression, I’ll be keeping things as minimal as possible. Instead of using powerful machine learning libraries, we’ll rely mainly on NumPy and Pandas.
import numpy as np  # Numerical operations
import pandas as pd  # Data manipulations
import matplotlib.pyplot as plt  # Data visualizations
import seaborn as sns  # Advanced visualizations
import math # Mathematical functionsStep 2: Load and Explore the Dataset
Now that we’ve set up our toolbox, the next step is to bring in the data we’ll be working with. For this project, we’re using the Seattle Housing Dataset from Kaggle, which contains information about houses in Seattle, USA.
Each row in the dataset represents a house, and each column describes a characteristic of that house, such as size, number of beds, number of baths, and, of course, the price. Our goal is to use these features to predict house prices.
To follow along with this article, you can find the code implementation in a Jupyter Notebook in this GitHub repo.
2.1 Loading the Data
Let’s load the dataset using Pandas. The dataset is divided into train and test sets. Assuming you’ve already downloaded the dataset as a CSV file, here’s how to get it into a DataFrame (a table-like structure in Pandas):
# Loading the dataset from the csv file
data_train = pd.read_csv('seattle-housing-train-data.csv')
data_test = pd.read_csv('seattle-housing-test-data.csv')

# Preview first few rows
data_train.head()Here’s a sample of what the raw data looks like:

Looks simple, right? Well, not quite. As we’ll soon see, real-world data is messy, and cleaning it up is a crucial part of any machine learning workflow.
2.2 Understanding the Data
After loading the datasets, the next step is to understand its structure. Instead of checking the shape, columns, and data types separately, I prefer using the .info() method. It gives us a quick snapshot of everything we need to know: how many rows there are, the names of the columns, their data types, and whether or not they contain missing values.
# Get a concise summary of the dataset
data_train.info()RangeIndex: 2016 entries, 0 to 2015
Data columns (total 8 columns):
# Column Non-Null Count Dtype
--- ------ -------------- -----
0 beds 2016 non-null int64
1 baths 2016 non-null float64
2 size 2016 non-null float64
3 size_units 2016 non-null object
4 lot_size 1669 non-null float64
5 lot_size_units 1669 non-null object
6 zip_code 2016 non-null int64
7 price 2016 non-null float64
dtypes: float64(4), int64(2), object(2)
memory usage: 126.1+ KB
Breaking this down:
- Number of rows and columns
- The dataset has 505 rows and 8 columns.
- Each row represents one house listing, and each column represents some information about that house.
- Column names and data types
beds,baths,size, andpriceare numerical (int or float). These will likely be useful predictors for our model.size_unitsandlot_size_unitsare object (string) columns, they describe measurement units, which we’ll eventually need to clean or drop.zip_codeis numeric but actually represents categorical information (a location), not a continuous number.
- Missing values
- Most columns have 505 non-null values, meaning they’re complete.
- But
lot_sizeandlot_size_unitsonly have 428 non-null values, so about 77 rows have missing data. That’s something we’ll need to handle later.
At this stage, we already see a few red flags that will affect our model later:
- Mixed units in
size_unitsandlot_size_units. - Missing values in
lot_size. - Redundant columns that may not directly help in prediction.
Step 3: Data Cleaning
Real-world data is rarely perfect. In fact, one of the biggest surprises for beginners is just how much time data scientists spend cleaning and preparing datasets before even thinking about modeling. Machine learning algorithms expect clean, consistent, and numerical data — otherwise, the results can be misleading or the model might not work at all.
In this step, we’ll make sure our Seattle housing dataset is tidy and ready for analysis by checking for duplicates, missing values, and inconsistent categorical variables.
3.1 Checking for Duplicates
Sometimes, datasets contain the exact same row more than once, maybe a property was accidentally logged twice or included in multiple records. If we don’t remove these duplicates, our model will give extra weight to those repeated rows, biasing the results.
def check_duplicates(data):
    """
    Checks for duplicate rows and drops them if found.
    :param data: (pd.DataFrame) The dataset
    :return: (pd.DataFrame) Cleaned dataset
    """
    duplicates = data.duplicated().sum()
    print(f'Duplicate rows: {duplicates}')

    if duplicates > 0:
        data = data.drop_duplicates()
        print("Duplicates dropped.")
return data# Check for duplicates (Train Set)
data_train = check_duplicates(data=data_train)Duplicate rows: 9
Duplicates dropped
# Check duplicates (Test Set)
data_test = check_duplicates(data=data_test)Duplicate rows: 1
Duplicates dropped
3.2 Fix Missing Values and Standardize Columns
Missing data is another common issue. In our dataset, we’ve already noticed that the lot_size and lot_size_units columns don’t have complete information for every house. If we ignore this, the model might crash or learn incorrect patterns.
There are several ways to deal with missing values:
- Dropping rows that are incomplete.
- Filling them in (imputation) using averages, medians, or even more advanced techniques.
The right choice depends on how important the column is and how much data is missing. For this case, the important column for us is the lot_size. We will fill the missing values with the median, but first we need to make the column values consistent since it has a mix of sqft and acre.
Let’s first start by checking for the missing values in both the train and test sets, since both sets need to be processed for our model to work well.
def check_missing_values(data):
    """
    Identifies and replaces empty strings with NaN,
    then prints missing value counts.
    :param data: (pd.DataFrame) The dataset
    :return: (pd.DataFrame) Dataset with NaNs marked
    """
    categorical_cols = data.select_dtypes(include='object').columns
    data[categorical_cols] = data[categorical_cols].replace(r'^\s*$', np.nan, regex=True)

    print("Missing values per column:")
    print(data.isnull().sum())
return data# Check for missing values (Train Set)
data_train = check_missing_values(data=data_train)Missing values per column:
beds 0
baths 0
size 0
size_units 0
lot_size 347
lot_size_units 347
zip_code 0
price 0
dtype: int64
# Check for missing values (Test Set)
data_test = check_missing_values(data=data_test)Missing values per column:
beds 0
baths 0
size 0
size_units 0
lot_size 77
lot_size_units 77
zip_code 0
price 0
dtype: int64
As you can see, both datasets have missing values, and we need to address them. We will fill the missing values with the median value since it’s more robust and is not affected much by outliers. One thing to note is that we will work out the median of the train set to fill out the missing values for both the train and test sets. This is to keep the consistency in the imputation of both datasets.
def fix_missing_values(data, is_train=False, median=None):
    """
    Cleans and standardizes lot size data:
      - Converts 'lot_size' from acres to square feet where necessary
      - Fills missing values with the median (from train if is_train=True, otherwise provided)
      - Renames 'size' column to 'size_sqft'
      - Drops redundant columns: ['lot_size', 'lot_size_units', 'size_units']

    Parameters
    ----------
    data : pd.DataFrame
        The dataset to clean.
    is_train : bool, optional (default=False)
        If True, compute median from this dataset. If False, use provided median.
    median : float, optional
        Median value from training data. Required if is_train=False.

    Returns
    -------
    pd.DataFrame
        Cleaned dataset with standardized 'lot_size_sqft' and no redundant columns.
    float
        The computed median (if is_train=True), else the passed median.
    """

    # Convert lot size to sqft
    if "lot_size" in data.columns and "lot_size_units" in data.columns:
        data.insert(3, "lot_size_sqft", data.apply(
            lambda row: row['lot_size'] * 43560 if row['lot_size_units'] == 'acre' else row['lot_size'],
            axis=1
        ))
    else:
        raise ValueError("Expected columns ['lot_size', 'lot_size_units'] not found in dataset.")

    # Handle missing values
    if is_train:
        median = data['lot_size_sqft'].median()
    elif median is None:
        raise ValueError("Median must be provided when is_train=False.")

    data['lot_size_sqft'] = data['lot_size_sqft'].fillna(median)

    # Rename 'size' column if present
    if 'size' in data.columns:
        data = data.rename(columns={'size': 'size_sqft'})

    # Drop redundant columns if they exist
    drop_cols = [col for col in ['lot_size', 'lot_size_units', 'size_units'] if col in data.columns]
    data = data.drop(columns=drop_cols)

return data, median# Standardize columns and fix missing values (Train Set)
data_train, median_train = fix_missing_values(data=data_train, is_train=True)
data_train.head()
# Standardize columns and fix missing values (Test Set)
data_test, _ = fix_missing_values(data=data_test, is_train=False, median=median_train)Step 4: Exploratory Data Analysis (EDA)
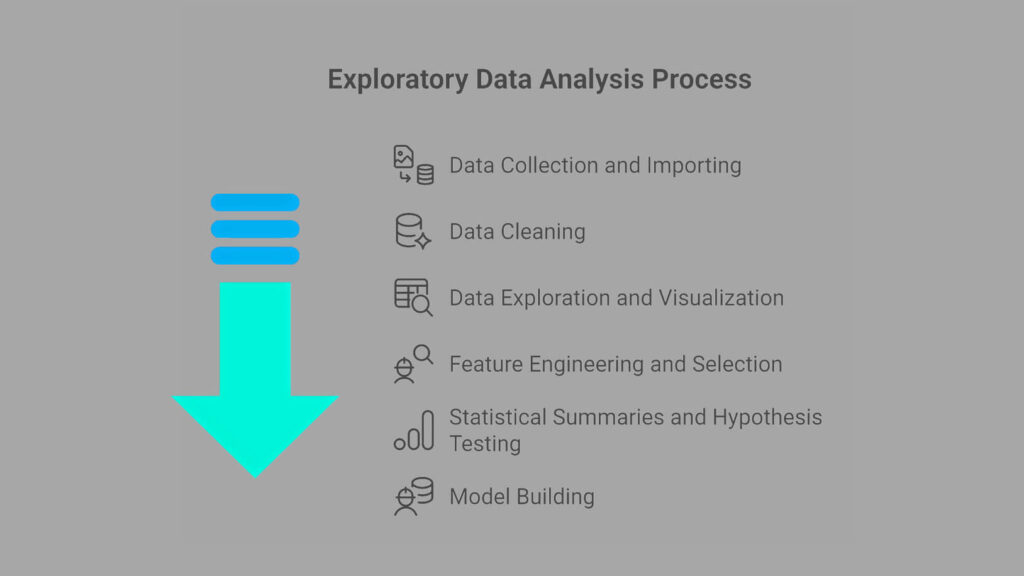
Once our data is cleaned, the next step is to explore it. EDA is like detective work: we’re trying to uncover patterns, relationships, and potential problems in the data before we build any models.
The goal here isn’t just to generate pretty charts, it’s to understand how the features behave, how they relate to the target variable (price), and whether there are any issues (like outliers or skewed distributions) that could confuse our model.
We’ll look at the data in three stages: univariate (one variable at a time), bivariate (two variables), and multivariate (many variables together).
4.1 Univariate Analysis of the Target Variable (price)
We’ll start by focusing on our target variable: price. Since our whole project is about predicting house prices, it makes sense to deeply understand what those prices look like in the dataset.
4.1.1 Statistical Information
The .describe() method gives us basic summary statistics — mean, median, minimum, maximum, and quartiles. This quick snapshot helps us see whether house prices are generally high, low, or spread out across a wide range.
data_train['price'].describe().to_frame().Tcount mean std min 25% 50% 75% max
price 2,007 964,070 946,123 159,000 600,000 800,000 1,109,000 25,000,000
Looking at the summary statistics for price, a few things stand out:
- There are 2,007 houses in our dataset.
- The average (mean) price is about $964,070, but the median (50%) price is lower at $800,000. This gap suggests that there are some very expensive homes pulling the mean upwards.
- Most homes fall between $600,000 (25th percentile) and $1,109,000 (75th percentile).
- The cheapest home is priced at $159,000, while the most expensive reaches an eye-popping $25 million.
- The standard deviation is very high (~$946,123), which tells us house prices vary a lot across the dataset.
In short, Seattle’s housing market is highly varied, with most homes clustered under $1.2M, but a handful of luxury properties driving up the average.
4.1.2 Check for Outliers
Outliers are unusually high or low values that don’t fit the general trend. For house prices, these might be ultra-luxury homes worth millions, which could distort the scale of our model. Spotting and handling them is important because linear regression is sensitive to extreme values.
q1 = data_train['price'].quantile(0.25)
q3 = data_train['price'].quantile(0.75)
iqr = q3 - q1
lower = q1 - 1.5 * iqr
upper = q3 + 1.5 * iqr
outliers = data_train[(data_train['price'] < lower) | (data['price'] > upper)]['price']
print(f'Outliers: {len(outliers)}')Outliers: 116
When we checked for outliers in the price column, we found 116 houses that stand far outside the typical price range. These are mostly ultra-luxury properties worth millions, compared to the majority of homes priced under $1.2M.
Outliers aren’t “bad data”, they’re real houses, but they can heavily influence a linear regression model, pulling the regression line towards them. That’s why it’s important to identify them now. Later, we’ll decide whether to keep them (if they’re relevant for prediction) or remove them (if they distort the model too much).
4.1.3 Check for skewness
Skewness tells us whether the distribution of prices leans heavily to the left (a few very cheap homes) or to the right (a few extremely expensive homes). Since linear regression assumes normally distributed errors, a highly skewed target variable could affect model performance.
# Check for skewness
print(f'Skewness: {data_train['price'].skew()}')Skewness: 16.91
Since our skewness is 2.89, that’s a very strong positive skewness. This means most Seattle homes are clustered in the lower-to-mid price ranges, but a handful of very expensive luxury houses stretch the distribution to the right.
This also explains why the mean price ($964K) is higher than the median price ($800K), those multi-million-dollar homes are pulling the average upward.
4.1.4 Distribution of the price variable
Finally, we’ll visualize house prices using a histogram and a box plot. This gives us a clear picture of how prices are spread out, whether most homes fall into a certain price range, or whether the distribution is uneven.
plt.figure(figsize=(14, 5))

# Histogram
plt.subplot(1, 2, 1)
sns.histplot(data_train['price'], kde=True)
plt.title('Distribution of Price')
plt.xlabel('Price')
plt.ylabel('Count')

# Boxplot
plt.subplot(1, 2, 2)
sns.boxplot(data_train['price'], color='lightgreen')
plt.title('Distribution of Price')
plt.ylabel('Count')

plt.show()
The histogram shows a right-skewed distribution, with most houses priced between $600k and $1.1M, while the boxplot further highlights this skew with many high-value outliers extending far above the upper whisker. Together, these visualizations confirm that Seattle’s housing prices are dominated by moderately priced homes, but with a significant presence of ultra-expensive properties driving up the mean.
4.2 Bivariate Analysis of Numerical Values vs. Target (price)
Once we understand the target, the next step is to explore how other numerical variables (like beds, baths, size, lot_size) relate to price.
4.2.1 Correlation Heatmap
A correlation heatmap gives us a bird’s-eye view of relationships between variables. For instance, we might find that:
sizehas a strong positive correlation withprice(bigger homes → more expensive).bedsandsizeare also strongly correlated (bigger houses usually mean more bedrooms).
This helps us identify which variables are likely to be the strongest predictors, and also warns us about multicollinearity (when two features are so closely related that they could confuse the model).
# Drop zip_code from the numerical columns as that is a categorical variable not continuous.
numerical_cols = data_train.select_dtypes(include='number').columns.drop(['zip_code'])

# Plot correlation heatmap
corr_mat = data_train[numerical_cols].corr()
plt.figure(figsize=(10, 5))
sns.heatmap(corr_mat, annot=True, cmap='coolwarm', fmt='.2f', linewidths=0.5)
plt.show()
Key insights include:
size_sqfthad the strongest linear relationship with price.bedsandbathswere step-wise (less ideal for simple linear regression).lot_size_sqftwas noisy, bigger lots didn’t always mean higher prices.
4.2.2 Scatter plot
Scatter plots are one of the most powerful ways to see relationships between a single feature and the target. For example:
sizevs.price: Do bigger houses generally cost more?bedsvs.price: Does adding bedrooms always increase price, or is there a limit?
By plotting these, we can spot patterns (linear or non-linear) and also detect if some variables don’t really influence price much at all.
# Drop price so that we can compare against it.
numerical_cols = numerical_cols.drop(['price'])

n_cols = 2
n_rows = math.ceil(len(numerical_cols) / n_cols)
plt.figure(figsize=(6 * n_cols, 4 * n_rows))

for i, col in enumerate(numerical_cols, 1):
    plt.subplot(n_rows, n_cols, i)
    sns.scatterplot(data=data_train, x=col, y='price')
    plt.title(f'{col} vs Price')
    sns.regplot(
        x=col,
        y="price",
        data=data_train,
        scatter=False,
        color="red",
    )

plt.subplots_adjust(hspace=0.5, wspace=0.2)
plt.show()
Decision: We visually see that size_sqft is the best linear relationship with price so we will select it as the primary feature for the model.
Step 5: Implementing Linear Regression from Scratch
5.1 Feature Scaling: Why It Matters
Before training a model using gradient descent, we need to scale the feature values. Otherwise, gradient descent may take tiny steps and converge very slowly (or not at all).
We can use Z-score normalization:
\(X_{scaled} = \frac{X – \mu}{\sigma}\)
- Where
μis the mean andσis the standard deviation of the feature.
We scaled both our input features size and our target variable price using this method.
def preprocess_features_targets(X_train, y_train, X_test, y_test):
    """
    Standardizes features and log-transforms the target for both train and test sets.

    Parameters
    ----------
    X_train : np.ndarray
        Training feature array (1D or 2D).
    y_train : np.ndarray
        Training target array (1D).
    X_test : np.ndarray
        Test feature array (1D or 2D).
    y_test : np.ndarray
        Test target array (1D).

    Returns
    -------
    X_train_scaled : np.ndarray
        Scaled training features.
    y_train_log : np.ndarray
        Log-transformed training target.
    X_test_scaled : np.ndarray
        Scaled test features (using train mean & std).
    y_test_log : np.ndarray
        Log-transformed test target.
    x_mean : float
        Mean of training features (for inverse transform).
    x_std : float
        Standard deviation of training features (for inverse transform).
    """

    # Compute scaling parameters from training set only
    x_mean = X_train.mean()
    x_std = X_train.std()

    # Scale features
    X_train_scaled = (X_train - x_mean) / x_std
    X_test_scaled = (X_test - x_mean) / x_std

    # Log transform target
    y_train_log = np.log(y_train)
    y_test_log = np.log(y_test)

return X_train_scaled, y_train_log, X_test_scaled, y_test_log, x_mean, x_std# Extract the feature and target
X_train = data_train['size_sqft']
y_train = data_train['price']
X_test = data_test['size_sqft']
y_test = data_test['price']
X_train_scaled, y_train_log, X_test_scaled, y_test_log, x_mean, x_std = preprocess_features_targets(
X_train, y_train, X_test, y_test
)
# Preview results
print(f"Mean: {x_mean:.2f}")
print(f"Standard Deviation: {x_std:.2f}")
print(f"First 5 scaled values of the train set:")
X_train_scaled[:5]Mean: 1738.77
Standard Deviation: 920.33
First 5 scaled values of the train set:
0 0.924913
1 0.544616
2 0.327304
3 2.239652
4 -0.757084
Name: size_sqft, dtype: float64
Step 6: Implementing the Cost Function (MSE)
To evaluate our model’s predictions, we use the Mean Squared Error (MSE):
\(J_{(w,b)} = \frac{1}{2m}\sum_{i=1}^{m}(\hat{y}^{(i)}-y^{(i)})^{2}\)
mis the number of training exampleswis the weight (slope)bis the bias (intercept)ŷis the predicted priceyis the actual price
The goal of training is to find values of w and b that minimize this cost function.
def compute_cost(X, y, w, b):
    """
    Compute the Mean Squared Error (MSE) cost for linear regression.

    Parameters:
    ----------
    X : numpy array of shape (m,)
        The input feature values (e.g., house sizes). Already normalized if needed.

    y : numpy array of shape (m,)
        The actual target values (e.g., house prices).

    w : float
        The weight (slope) of the model — how much price increases with size.

    b : float
        The bias (intercept) of the model — the predicted price when size = 0.

    Returns:
    -------
    float
        The computed cost (error) using Mean Squared Error:
    """

    # Number of training examples
    m = len(y)

    # Calculate the model's predicted values for each input (ŷ = X * w + b)
    y_pred = np.dot(X, w) + b

    # Compute the squared difference between predicted and actual values
    squared_errors = (y_pred - y) ** 2

    # Compute the final cost using the MSE formula with a factor of 1/(2m)
    cost = (1 / (2 * m)) * np.sum(squared_errors)

    return cost
Step 4: Training with Gradient Descent
I implemented batch gradient descent manually. At each step, we updated the weight and bias using the gradients:
\(w = w\text{ }-\text{ }\alpha\cdot\frac{∂J}{∂w}\)
\(b = b\text{ }-\text{ }\alpha\cdot\frac{∂J}{∂b}\)
def gradient_descent(X, y, w, b, learning_rate, iterations):
    """
    Performs batch gradient descent to optimize parameters w and b
    for a linear regression model.

    Parameters:
    ----------
    X : numpy array of shape (m,)
        Input features (e.g., house sizes), typically standardized.

    y : numpy array of shape (m,)
        Actual target values (e.g., house prices), also standardized if X is.

    w : float
        Initial weight (slope) of the model.

    b : float
        Initial bias (intercept) of the model.

    learning_rate : float
        Controls the step size during each iteration — how much to update w and b.

    iterations : int
        Total number of iterations to run gradient descent.

    Returns:
    -------
    w : float
        Final optimized weight after gradient descent.

    b : float
        Final optimized bias after gradient descent.

    cost_history : list of float
        Cost at each iteration (for visualization and analysis).
    """

    m = len(y)  # Number of training examples
    cost_history = []  # To keep track of cost over iterations

    for i in range(iterations):
        # STEP 1: Make predictions using the current w and b
        y_pred = np.dot(X, w) + b

        # STEP 2: Compute the error (difference between predictions and actual values)
        error = y_pred - y

        # STEP 3: Compute gradients for w and b
        dw = (1 / m) * np.dot(error, X)       # Gradient of cost w.r.t weight
        db = (1 / m) * np.sum(error)          # Gradient of cost w.r.t bias

        # STEP 4: Update the parameters using the gradients
        w -= learning_rate * dw
        b -= learning_rate * db

        # STEP 5: Calculate and store the current cost
        cost = compute_cost(X, y, w, b)
        cost_history.append(cost)

        # Print progress every 100 iterations
        if i % 100 == 0:
            print(f"Iteration {i}: Cost = {cost:.4f}")

return w, b, cost_historyWe now need to train the model using gradient descent, but first, we need to set the hyperparameters.
# Set hyperparameters
iterations = 10000
learning_rate = 0.001
initial_weight = 0
initial_bias = 0

# Train the model
final_weight, final_bias, cost_history = gradient_descent(
    X_train_scaled, y_train_log, initial_weight, initial_bias, learning_rate, iterations
)

print(f"Final Parameters: w = {final_weight:.4f}, b = {final_bias:.4f}")We chose:
- Learning Rate (
α) = 0.001 - Iterations = 10,000 (but we stopped early upon convergence).
After about 6,000 iterations, the cost stopped improving significantly, which meant the model had converged.
Final parameters:
- Weight (
w) ≈ 0.3848 - Bias (
b) ≈ 13.5907
Step 5: Making Predictions
Using the final model parameters, we predicted prices for the houses in the dataset. Since the model was trained on scaled values, we had to rescale predictions back to their original dollar amounts using:
\(\hat{y}_{\text{original}}\text{ }=\text{ }\hat{y}_{\text{scaled}}\text{ }\cdot\text{ }\sigma_{y}\text{ }+\text{ }\mu_{y}\)
# Predict scaled prices (log-space)
y_hat_log = final_weight * X_test_scaled + final_bias
y_hat = np.exp(y_hat_log) # Convert back to original price scaleStep 6: Visualizing the Regression Line
We then plot the predictions against the actual data to visualize the regression line. The results show that our model captured the general upward trend between size_sqft and price, though not all points aligned perfectly.
# Convert to NumPy for plotting
X_test_np = np.array(X_test)          # original sqft
y_test_np = np.array(y_test)          # original prices
y_hat_np = np.array(y_hat)            # predicted prices

# Sort values by X for a clean regression line
sorted_idx = np.argsort(X_test_np)
X_sorted = X_test_np[sorted_idx]
y_hat_sorted = y_hat_np[sorted_idx]

# Plot
plt.figure(figsize=(10, 6))
plt.scatter(X_test_np, y_test_np, label="Actual Data", alpha=0.5)
plt.plot(X_sorted, y_hat_sorted, color="red", label="Regression Line", linewidth=2)
plt.title("Linear Regression: Predicted Price vs Size (sqft)")
plt.xlabel("Size (sqft)")
plt.ylabel("Price ($)")
plt.legend()
plt.grid(True)
plt.show()
The line captured the general trend, but some outliers remained.
Step 7: Evaluating the Model
To quantify the model’s performance, we used:
- Root Mean Squared Error (RMSE)
Measures the average prediction error in the same units as the target variable (price in dollars):
Lower RMSE = better fit.
\(RMSE\text{ }=\text{ }\sqrt{\frac{1}{m}\sum_{i=1}^{m}(\hat{y}_{i}-y_{i})^{2}}\)
- R² Score
Represents the proportion of variance in the target explained by the model:
\(R^{2}=1-\frac{\sum_{}^{}(\hat{y}-y)^{2}}{\sum_{}^{}(y-\bar{y})^{2}}\)
- R2 = 1.0: perfect prediction
- R2 = 0.0: model predicts the mean
- R2 < 0: worse than guessing the mean
# Compute RMSE
rmse = np.sqrt(mean_squared_error(y_test, y_hat))

# Compute R² score
r2 = r2_score(y_test, y_hat)

# Display results
print(f"RMSE: ${rmse:,.2f}")
print(f"R² Score: {r2:.4f}")RMSE: $441,233.39
R² Score: 0.4742
The R² value isn’t high, and that’s expected. This is a very simple model using just one feature size_sqft. The purpose here wasn’t to beat a leaderboard, but to understand and implement the full pipeline from scratch.
Final Summary & Reflections
In this project, we built a linear regression model from scratch using NumPy to predict house prices in Seattle. We worked step by step through the full machine learning pipeline, including:
- Data cleaning & preprocessing (unit standardization, missing value handling).
- Exploratory data analysis (scatter plots, correlation checks).
- Feature scaling using Z-score normalization.
- Model implementation: cost function (MSE), gradient descent.
- Model training and prediction with visualization.
- Model evaluation using RMSE and R² Score.
Key Learnings
- Implementing algorithms from scratch is the best way to deeply understand how they work.
- Feature selection significantly impacts model performance.
- Standardizing data is crucial when using gradient descent.
- Real-world data is messy — handling units, missing values, and scale differences is essential.
- Evaluation metrics tell the real story about a model’s performance.
Want to See the Full Code?
Check out the GitHub repository here: GitHub Repository Link